Raspberry pi セットアップその5 samba3.6.6のインストールと設定
1. sambaのインストール
Debian系でのパッケージ名は sambaです。下記コマンドでインストールします。
[root@limau]:~# apt-get -y install samba
[root@limau]:~# apt-get -y install samba-common-bin
作業ディレクトリに移動します
[root@limau]:~# cd /etc/samba
2. sambaのGlobal設定
設定ファイルは /etc/samba/smb.confです。
[root@limau]:samba# vi /etc/samba/smb.conf
元のファイルが大変わかりづらいので、いったんすべて消して下記のように設定します。
[global]
dos charset = CP932
unix charset = UTF-8
display charset = UTF-8
workgroup = Workgroup
netbios name = Limau
server string = Raspberry pi
hosts allow = 172.16.0. 127.
security = user
encrypt passwords = yes
username map = /etc/samba/smbusers
name resolve order = lmhosts host wins bcast
dns proxy = no
ldap ssl = no
passdb backend = tdbsam
client NTLMv2 auth = yes
client plaintext auth = no
2. sambaのshare設定
続いて共有するディレクトリの設定を追記します。たとえばこれは自分以外には閲覧を許可しないようなディレクトリです。
[storage]
[storage]
path = /storage
writable = yes
hide unreadable = yes
create mask = 0664
directory mask = 0775
valid users = @www-data
vfs objects = recycle
recycle:exclude = *.tmp *~
recycle:maxsize = 0
recycle:touch = no
recycle:versions = yes
recycle:keeptree = no
recycle:repository = .recycle%u
たとえばこれは来客にも閲覧を可能にするようなディレクトリです
[media]
path = /storage/Media
writable = no
hide unreadable = yes
guest ok = yes
たとえばこれは来客にも読み書きを可能にするようなディレクトリです
[public]
path = /storage/Public
guest ok = yes
writable = yes
hide unreadable = yes
create mask = 0664
directory mask = 0775
vfs objects = recycle
recycle:repository = .recycle%u
recycle:exclude = *~
recycle:maxsize = 0
recycle:touch = no
recycle:versions = yes
recycle:keeptree = yes
ディレクトリを作成します
[root@limau]:~# mkdir /storage
[root@limau]:~# chmod -c 775 /storage
4. lmhostの設定
ホスト名解決のためのテーブルを設定します。同じファイルを Windowsマシンの Windowssystem32driversetc にも保存します。
[root@limau]:~# vi /etc/samba/lmhosts
172.16.0.2 nanas
172.16.0.155 kelapa
172.16.0.220 tembikai
172.16.0.225 limau
172.16.0.130 manggis
5. ユーザの管理
既存のlinuxアカウントを www-dataグループに追加します。
[root@limau]:~# usermod -G www-data username
アカウントをsambaユーザに登録します。Linuxアカウントとのパスワード同期はとりません。
[root@limau]:~# pdbedit -a -u username
(中略)
new password: # ここでパスワード入力
retype new password: # 再入力
(中略)
Unix username: username
NT username:
Account Flags: [U ]
User SID: S-1-5-21-xxxxxxxxx-xxxxxxxxxx-xxxxxxxxxx-1000
Primary Group SID: S-1-5-21-xxxxxxxxx-xxxxxxxxxx-xxxxxxxxxx-513
Full Name:
Home Directory:
HomeDir Drive:
Logon Script:
Profile Path:
Domain: LIMAU
Account desc:
Workstations:
Munged dial:
Logon time: 0
Logoff time: never
Kickoff time: never
Password last set: 金, 27 9月 2013 11:03:26 JST
Password can change: 金, 27 9月 2013 11:03:26 JST
Password must change: never
Last bad password : 0
Bad password count : 0
Logon hours : FFFFFFFFFFFFFFFFFFFFFFFFFFFFFFFFFFFFFFFFFF
アカウントを確認します。
[root@limau]:~# pdbedit -L -v
(省略:登録時とおなじ結果が表示されれば問題ありません)
6. ディスクの用意とマウント
今回、USB外付けHDDとして、Ratoc systemのRS-EC22-U3Rを使用しました。Raspberry piにつなぐのにぴったりの超小型2.5inch HDD2台搭載可能HDDケースです。公式サイトでRAID1のことを「バックアップ」と言っていたり、NTFSかFAT32しか使えないなどいろいろ残念な部分もありますが、安価で超小型の2.5inch HDD静音RAID1ボックスが作れるのは魅力です。そしてこれ、ちょっと工夫すれば Raspberry pi が1台入るくらいの空間が本体内にあるんですよねえ(やりませんけど)。
NTFSへの書き込みができるように ntfs-3gドライバをインストールします。
[root@limau]:~# apt-get -y install ntfs-3g
ディスク内に必要なディレクトリ(/storage /storage/Media /storage/Public)を準備し、Raspberry piに接続した後、下記コマンドでディスクの確認をします。1台目のUSBディスクは /dev/sdaとして認識されているはずです。
[root@limau]:~# fdisk -l
Disk /dev/mmcblk0: 16.0 GB, 16009658368 bytes
4 heads, 16 sectors/track, 488576 cylinders, total 31268864 sectors
Units = sectors of 1 * 512 = 512 bytes
Sector size (logical/physical): 512 bytes / 512 bytes
I/O size (minimum/optimal): 512 bytes / 512 bytes
Disk identifier: 0x000b03b7Device Boot Start End Blocks Id System
/dev/mmcblk0p1 8192 122879 57344 c W95 FAT32 (LBA)
/dev/mmcblk0p2 122880 31268863 15572992 83 LinuxDisk /dev/sda: 1000.2 GB, 1000204880896 bytes
255 heads, 63 sectors/track, 121601 cylinders, total 1953525158 sectors
Units = sectors of 1 * 512 = 512 bytes
Sector size (logical/physical): 512 bytes / 512 bytes
I/O size (minimum/optimal): 512 bytes / 512 bytes
Disk identifier: 0x35240ba3Device Boot Start End Blocks Id System
/dev/sda1 2048 1953521663 976759808 7 HPFS/NTFS/exFAT ←これです
下記コマンドでマウントします。ファイルのパーミッションはディレクトリが rwxrwxr-x, ファイルが rw-rw-r– になります。
[root@limau]:~# mount /dev/sda1 -t ntfs-3g /storage -o uid=www-data -o gid=www-data -o dmask=0002,fmask=0113
起動時に自動マウントするには /etc/fstabに設定を追記します(4行目)。ただし fstabでは fmask dmaskが個別設定できません。
# vi /etc/fstab
proc /proc proc defaults 0 0
/dev/mmcblk0p1 /boot vfat defaults 0 2
/dev/mmcblk0p2 / ext4 defaults,noatime 0 1
/dev/sda1 /storage ntfs-3g defaults,locale=ja_JP.UTF-8,www-data.umask=0222,rw 0 0
# a swapfile is not a swap partition, so no using swapon|off from here on, use dphys-swapfile swap[on|off] for that
dmask, fmaskを有効にして自動マウントするには /etc/rc.localに記述します(20行目)。
# vi /etc/rc.local
#!/bin/sh -e
#
# rc.local
#
# This script is executed at the end of each multiuser runlevel.
# Make sure that the script will "exit 0" on success or any other
# value on error.
#
# In order to enable or disable this script just change the execution
# bits.
#
# By default this script does nothing.

# Print the IP address
_IP=$(hostname -I) || true
if [ "$_IP" ]; then
printf "My IP address is %sn" "$_IP"
fi

/bin/mount -t ntfs-3g /dev/sda1 /storage -o uid=www-data -o gid=www-data -o dmask=0002,fmask=0113

exit 0
7. 動作確認と起動順序の設定
下記コマンドでsambaを再起動します。
[root@limau]:~# service samba restart
起動順序を変更します。apacheのひとつ前にします。
[root@limau]:~# mv /etc/rc2.d/S01samba S29samba
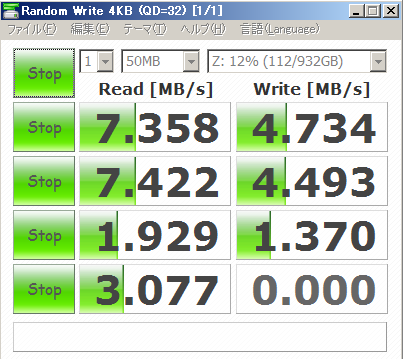
Windowsから ホスト名ディレクトリ名 で接続できればOKです。だいたい60Mbpsくらい出ると思います。
次回はdhcpdをインストールします。