Raspberry pi セットアップその9 iptablesの設定
2013年9月29日
1518
※全般的なことは公式サイトのFAQを参照。
1. rulesの作成
iptablesの管理用ツールはインストールされていません。手動で設定してもいいのですが、ここでは iptables-persistentを利用します。
[root@limau]:~# apt-get -y install iptables-persistent
インストール中に v4での設定をどうするか、v6での設定をどうするか確認されますが、とりあえず [n]キーで拒否しておきます。今回は v4の設定だけ使用するので下記のように /etc/iptables/rules.v4にルールを記述します。これまでインストールしたものに限ればこのポートで透過できます。iptables-peresistentをインストールする前に /etc/iptablesに設定ファイルを作成していると問答無用で消されるので注意しましょう……。
[root@limau]:~# vi /etc/iptables/rules.v4
*filter

# Allows all loopback (lo0) traffic and drop all traffic to 127/8 that doesn't use lo0
-A INPUT -i lo -j ACCEPT
-A INPUT ! -i lo -d 127.0.0.0/8 -j REJECT

# Accepts all established inbound connections
-A INPUT -m state --state ESTABLISHED,RELATED -j ACCEPT

# Allows all outbound traffic
# You could modify this to only allow certain traffic
-A OUTPUT -j ACCEPT

# Allows dhcp connections from local
-A INPUT -p udp --dport 67 -j ACCEPT
-A INPUT -p udp --dport 68 -j ACCEPT

# Allows HTTP and HTTPS connections from anywhere (the normal ports for websites)
-A INPUT -p tcp --dport 80 -j ACCEPT
-A INPUT -p tcp --dport 443 -j ACCEPT

# Allows DNS connections for bind9
-A INPUT -p tcp -m state --state NEW --dport 53 -j ACCEPT
-A INPUT -p udp -m state --state NEW --dport 53 -j ACCEPT

# Allows NTP connections for ntpd
-A INPUT -p tcp -m state --state NEW --dport 123 -j ACCEPT
-A INPUT -p udp -m state --state NEW --dport 123 -j ACCEPT

# Allows porxy connections for privoxy
-A INPUT -p tcp -m state --state NEW --dport 8118 -j ACCEPT
-A INPUT -p udp -m state --state NEW --dport 8118 -j ACCEPT

# Allows fileshare connections for samba
-A INPUT -p tcp -m state --state NEW --dport 139 -j ACCEPT
-A INPUT -p udp -m state --state NEW --dport 138 -j ACCEPT
-A INPUT -p udp -m state --state NEW --dport 137 -j ACCEPT
-A INPUT -p tcp -m state --state NEW --dport 445 -j ACCEPT

# Allows SSH connections
-A INPUT -p tcp -m state --state NEW --dport 22 -j ACCEPT

# Allow ping
-A INPUT -p icmp -m icmp --icmp-type 8 -j ACCEPT

# log iptables denied calls (access via 'dmesg' command)
-A INPUT -m limit --limit 5/min -j LOG --log-prefix "iptables denied: " --log-level 7

# Reject all other inbound - default deny unless explicitly allowed policy:
-A INPUT -j REJECT
-A FORWARD -j REJECT

COMMIT
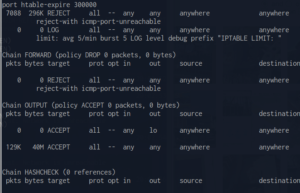
startで iptablesを有効に、flushで無効にできます。 iptables -Lで現在のテーブルが確認できます。
[root@limau]:~# service iptables-presistent start
次回は DLNAサーバの設定を行います。


